Professional Painters
Stamping
Compared to other paint effects, stamping really can be, quite literally child’s play. Make your own stamps from medium to high-density foam in the same way as a child makes potato-cut stamps, drawing on a design and then cutting away the excess foam with a scalpel. Stick the sponge onto a piece of wood and attach a small door knob to the back of it to make application easier. If, however, you would rather buy a stamp, there are many outlets that now stock a wide range of designs made from rubber or foam, thus making them very hard-wearing.
Apply the paint either with a roller or by dipping the stamp into a plate containing a small amount of paint. Ensure an even coating and then set to work, taking your design across the whole wall.
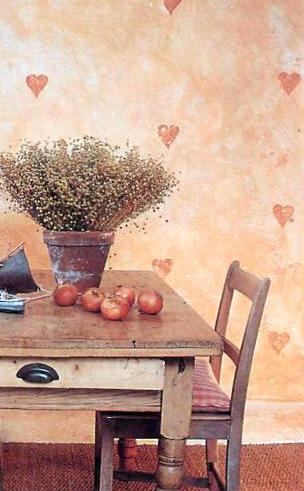
Stamping is the ideal paint technique if you’re short of time – or skill. A repeat design, such as this simple pattern of hearts stamped onto a colourwashed wall (above photo), gives a dramatic effect, but takes only a matter of hours to carry out.
Stencilling
This is one of the cheapest ways to provide a decorative finish. Use stencils to create a dramatic pictorial effect or use a motif to create a border or all-over pattern at a fraction of the cost of wallpaper. Choose from the enormous selection of pre-cut stencils available or make your own. Draw your design onto an acetate sheet and cut out with a sharp knife. Attach to the wall with masking tape or spray adhesive.
Next, apply the colour. Whether you are using a stencil brush or a spray can, the secret is a light touch. With a spray can, waft it quickly and gently over the surface, gradually building up the colour in subtle layers. If using a stencil brush, rub it on a piece of paper towel until almost all the paint has been removed from the head of the brush, then stipple or swirl it over the stencil. Remove the stencil, reposition and repeat the process.
Gilding
Few decorating projects are more satisfying than working with gold leaf. However, the expense of the material puts it far outside the pocket of most amateur decorators. There is no reason, though, why you should deprive yourself of using lustrous metallic materials in small quantities, perhaps on a motif against a wall painted in a deep rich colour such as lacquer red, midnight blue or forest green.
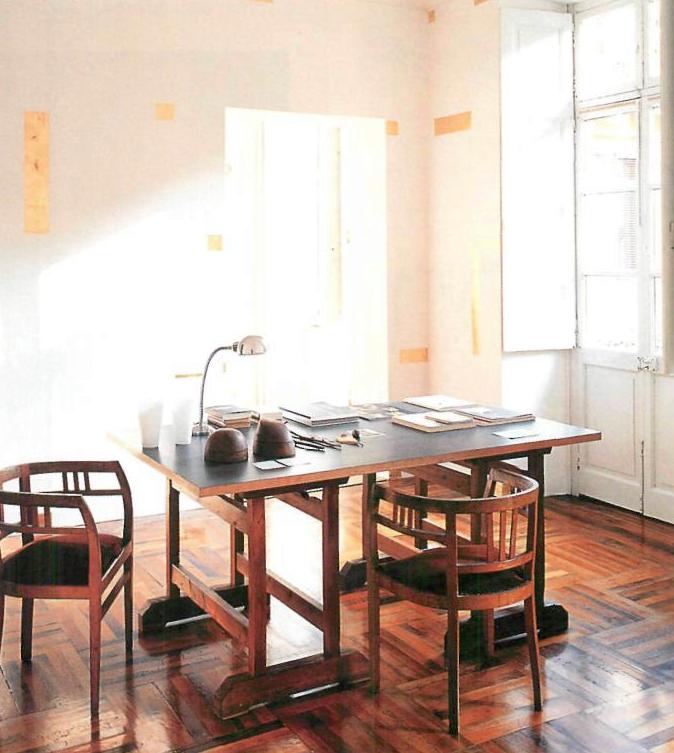
Given the costs involved, it makes sense to restrict the use of gilding to small areas. This random design of horizontal and vertical gold blocks is restrained but nonetheless extremely effective, giving interest to plain white walls and mirroring the angular patterns of the parquet flooring.
Dutch metal leaf or aluminium leaf are less expensive alternatives to the real thing. Aluminium leaf can be made to gleam like gold with one or two coats of orange shellac. These, and the substances mentioned below, are available from specialist decorating outlets. First, give the wall to be gilded a coat of flat or mid-sheen oil-based paint. Decide on your design or motif and either draw it freehand on the wall or use a stencil as a guide. Paint the areas to be gilded with ready-made red gesso for Dutch metal, or cobalt blue casein for silver or aluminium leaf. When this is dry, paint on a thin layer of goldsize, following the manufacturer’s instructions.
When the goldsize is only slightly tacky, gently press on a sheet of leaf, leaf-side down, on the sized area. Carefully peel away the leaf’s wax backing and lay down the next sheet so that it slightly overlaps with the first. Continue until you have built up your pattern. Leave for several hours to dry and rub off the loose leaf with a soft cloth; the rest of the leaf should remain in the sized area of your motif. Finish off by varnishing the whole surface with a clear, semi-gloss oil-based varnish.
For those who long for glitter, it is also worth checking out the wide range of metallic paints, powders, creams and pens on the market. These can be put to a wide range of decorating uses, from painting a whole wall to picking out moulding detail.